How to measure a stair case
Preparation
For stairs measurement please download the special targets and two start boards using the links in the Settings view of the app (one level back). Print the sheets and the targets on cardboard or glue them onto cardboard such that the targets are flat and not moving.Positioning of the measuring markers
- Place two markers on each tread. The green tip marks the measurement point.
- Place a reference sheet at the bottom of the stairs.
- Place additional markers around the reference sheet.
- Place the second reference sheet at the top of the stairs.
- Supplement the second reference sheet again with additional markers.
- Place two markers to the left and right of the front edge of the tread. In this case, the markers of the tread above will be automatically projected down and used for the tread geometry.
- You can also use three or more markers; then only these will be used for the tread geometry. In the Windows app, you can select the "Use points of the tread above" option to include these even when there are more than three markers.
- No duplicate markers! Under no circumstances should multiple Basic Kits or Extended Kits be mixed. Marks with identical numbers will result in missing steps or only a partial calculation of the project.
- Place the marks only on a solid surface, not on moving carpets, mats, or coverings such as foil, etc. Small movements of the mark can lead to significant measurement deviations.
Positioning of obstacle markers
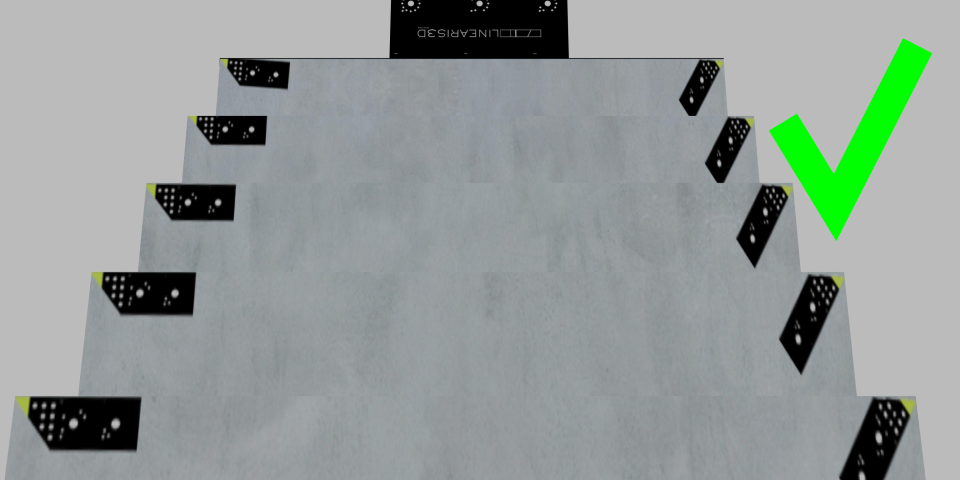
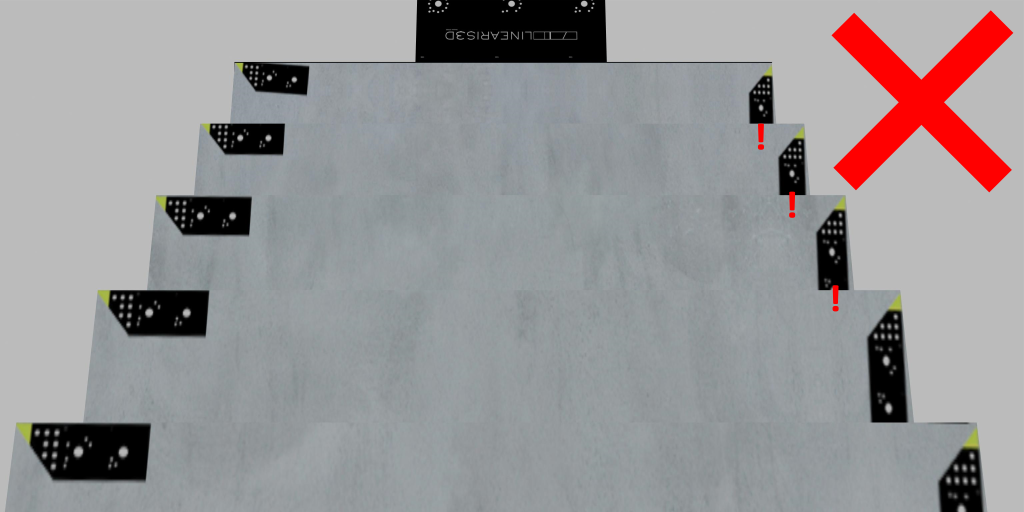
- Obstacle markers have a red tip on a black background. They are not used for the calculation of the staircase model.
- If the obstacle markers are placed in ascending order of their numbers at a distance of less than 50cm, a line is automatically generated, which can be seen in the DXF3D export file. In this way, obstacles, interference contours and parking positions can be marked.
Camera Requirements
- All iPhones less than four years old deliver good results. Use our StairsMeasure app for image capture for optimal results.
- iPads with flash are also suitable. Devices without flash have problems in dark environments with blurry and overly dark images.
- The photos should be taken with a focal length (converted to full format) between 24 and 35mm. Larger focal lengths depict too small a portion of the stairs, while smaller focal lengths distort the image excessively.
- No zoom lenses
- Always turn on the flash
- Resolution between 12 and 24 megapixels
- Image format approximately 4:3
- No automatic image orientation/rotation
Photo Requirements
- The photos must be sufficiently bright. Turn on all available light sources. Your camera's flash should be activated. If not, activate it.
- Set your camera to wide-angle/minimal zoom. Do not change the zoom settings between shots.
- The photos must be absolutely sharp! (see images below)
- Ensure that at least six brands are visible in each image. Check that the left and right markers of a step are visible in the image.
- Do not move the markers or the reference sheet. Even very slight movements could negatively affect the measurement results. Start again if the markers have moved.
- Stand directly next to the wall or railing when taking photos (including on the platforms at the top and bottom of the stairs). Standing in the middle of the stairs could negatively affect the precision or recognition rates.
- Step onto the next step after each photo. Projects where multiple photos are taken on a step without first changing steps fail significantly more often than normal. Steps or viewing directions are often missed if the step is not changed before each photo.
- Never take several photos from the same point of view in a row. Photos that are (almost) identical, do not contribute any new information to the staircase calculation and may even interfere with the calculation or lead to a failed computation.
Taking photos
- Start at the bottom platform.
- Take seven photos of the starting sheet.
- Walk up the stairs and take a photo on each step.
- Take at least seven photos on the top platform, especially from the edges of the platform towards the targets.
- Walk down the stairs and take a photo on each step in portrait mode. Try to cover as many steps as possible with one photo.
- Take seven photos of the starting sheet.
- Walk up the stairs and take a photo on each step.
- Take at least seven photos on the top platform
- Walk down the stairs and take a photo on each step.
- Divide the stair platforms into imaginary 50cm x 50cm squares and take photos out of each square.
Evaluation
Click "Compute" in the 3D view. A few seconds later you should see the results. You can export them from the settings menu at the bottom right.Right and Wrong
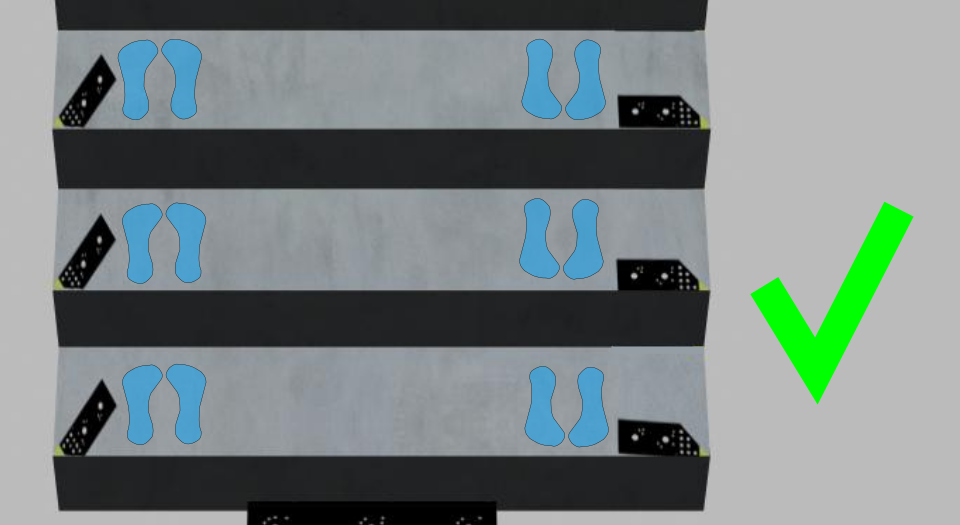
Do not step on the markers |
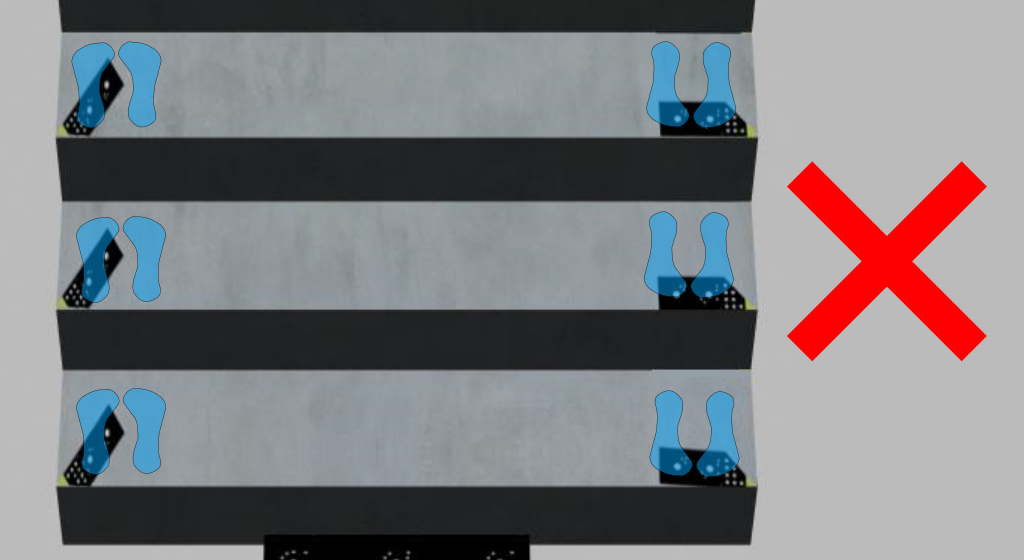
Wrong: Don't touch or move markers while taking pictures |
The markers should be clearly visible and, e.g., not be covered by other steps |
Wrong: markers not visible on the right side |
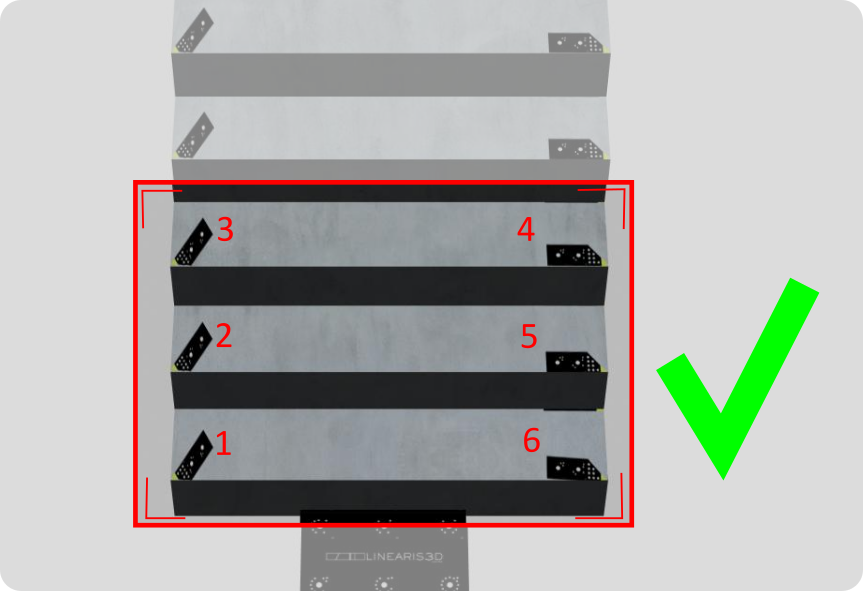
At least six markers per picture and two per step |
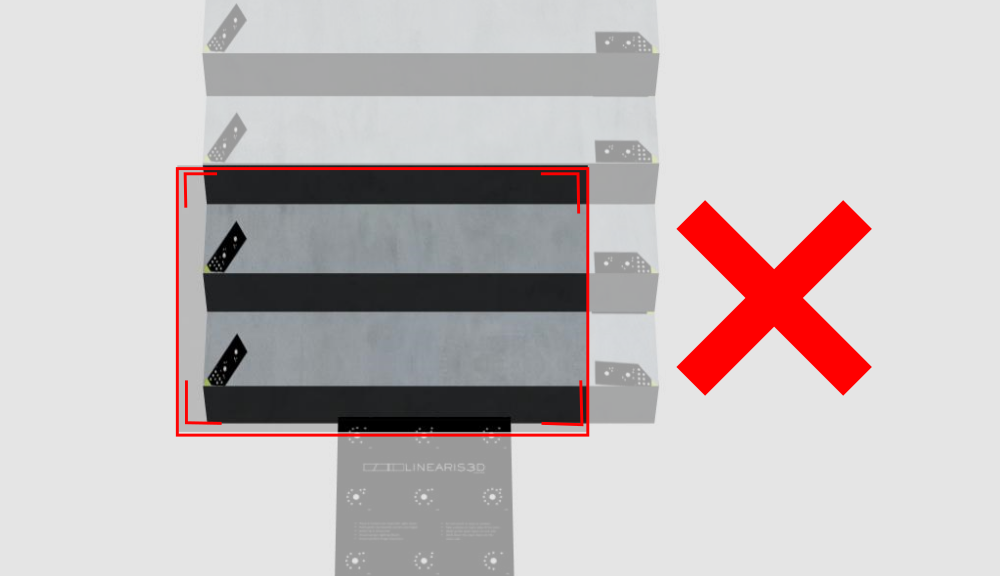
Wrong: Only one side of a step is visible |
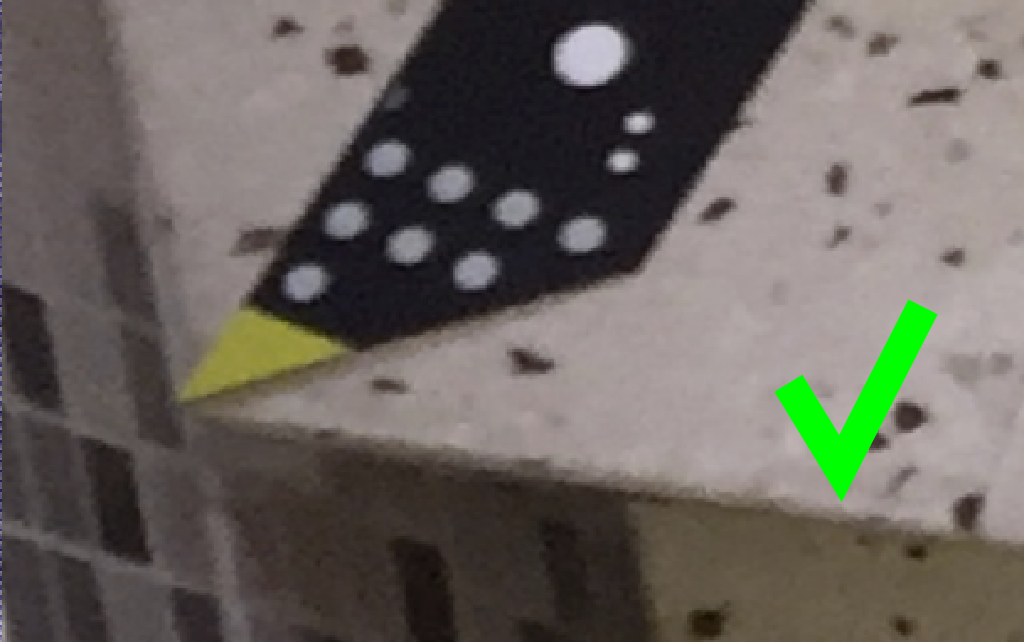
Sharp pictures are absolutely necessary |
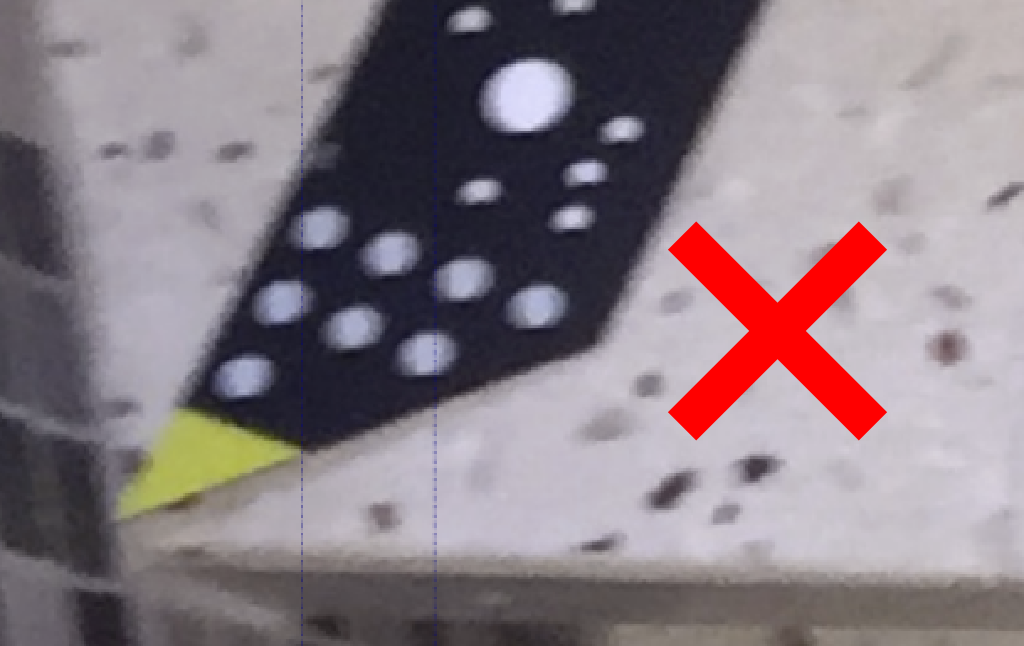
Wrong: blurred picture |
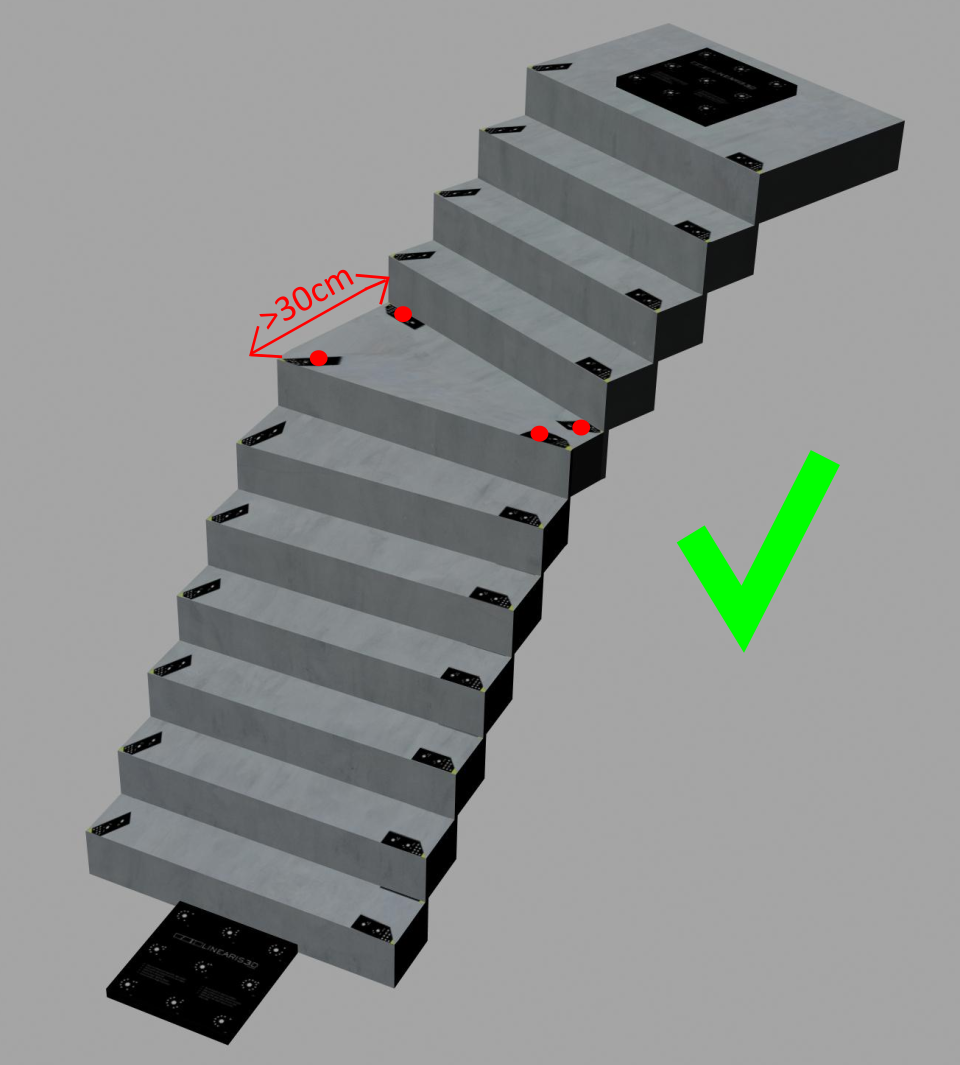
For steps wider than 30cm, 4 markers should be used per step |
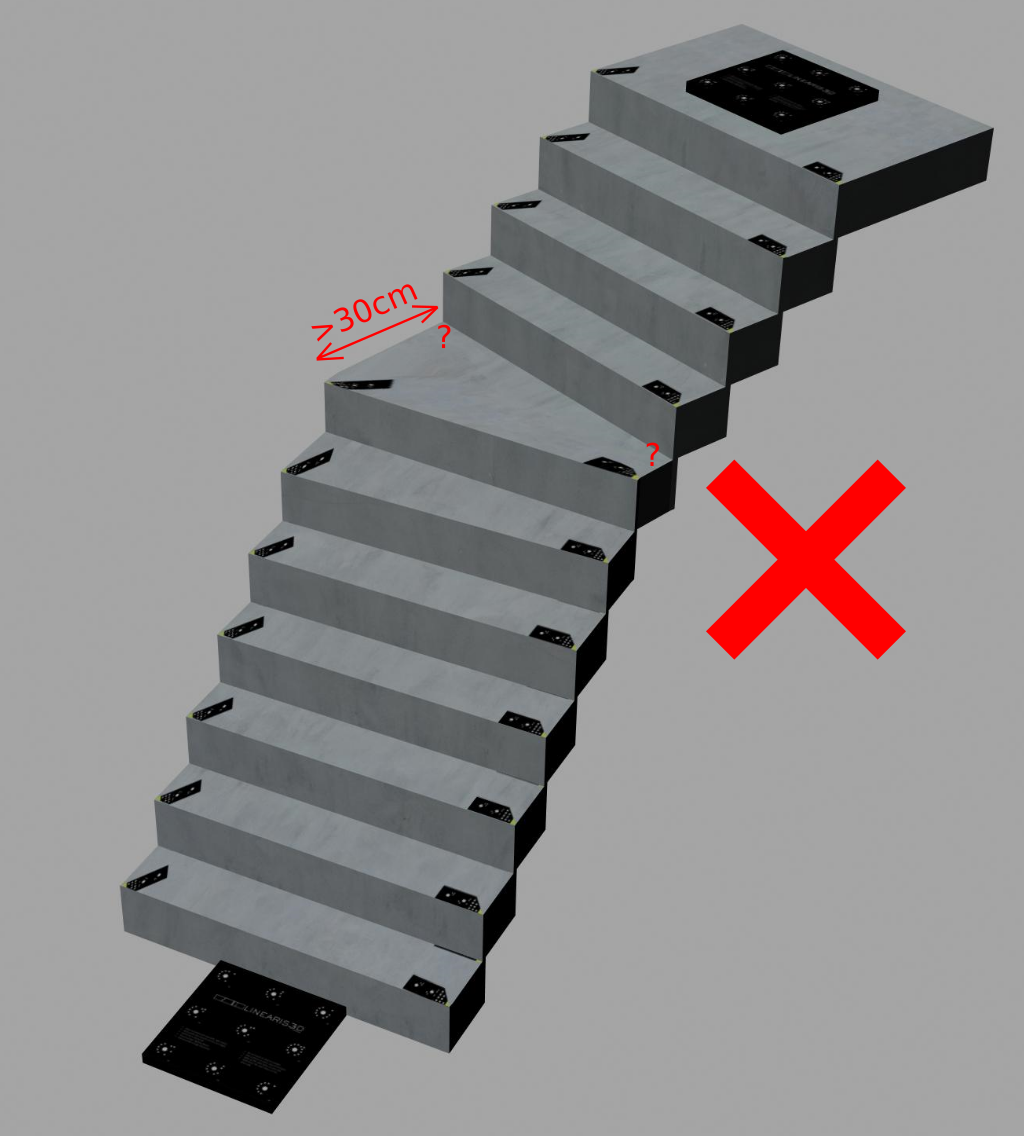
Wrong: Too long distances between the markers |
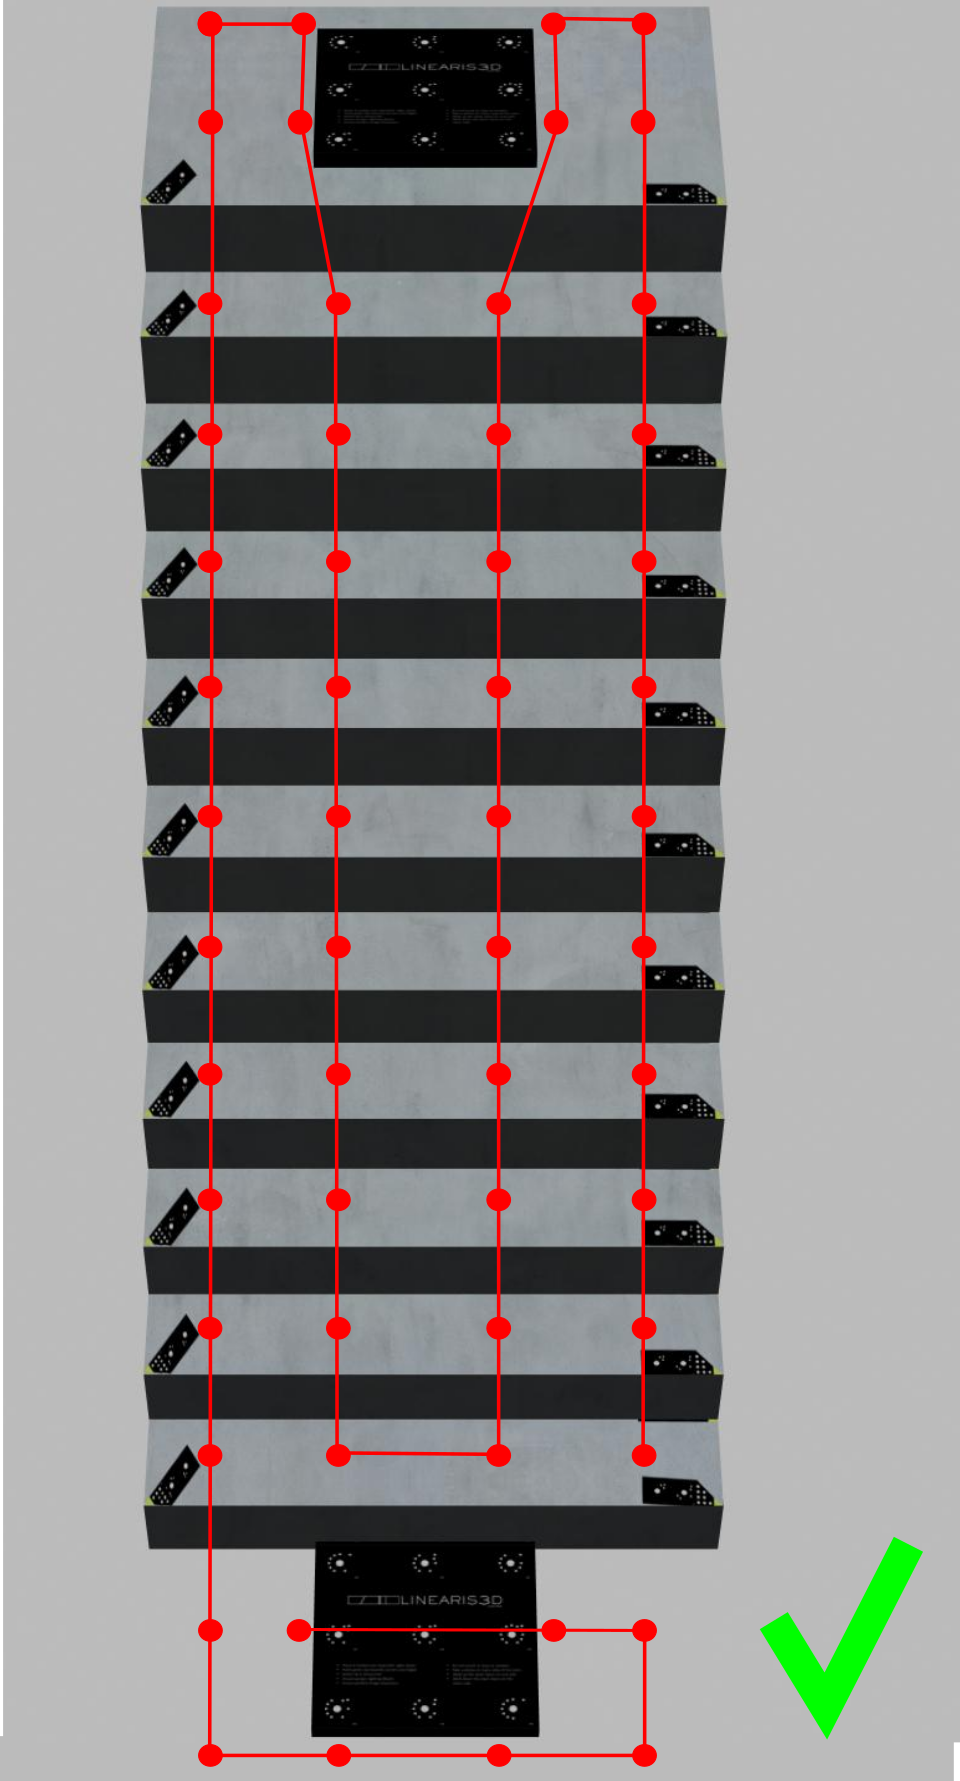
You should go upstairs and downstairs on the very left and the very right side of the stairs. so that pictures are taken from as many different angles as possible. |
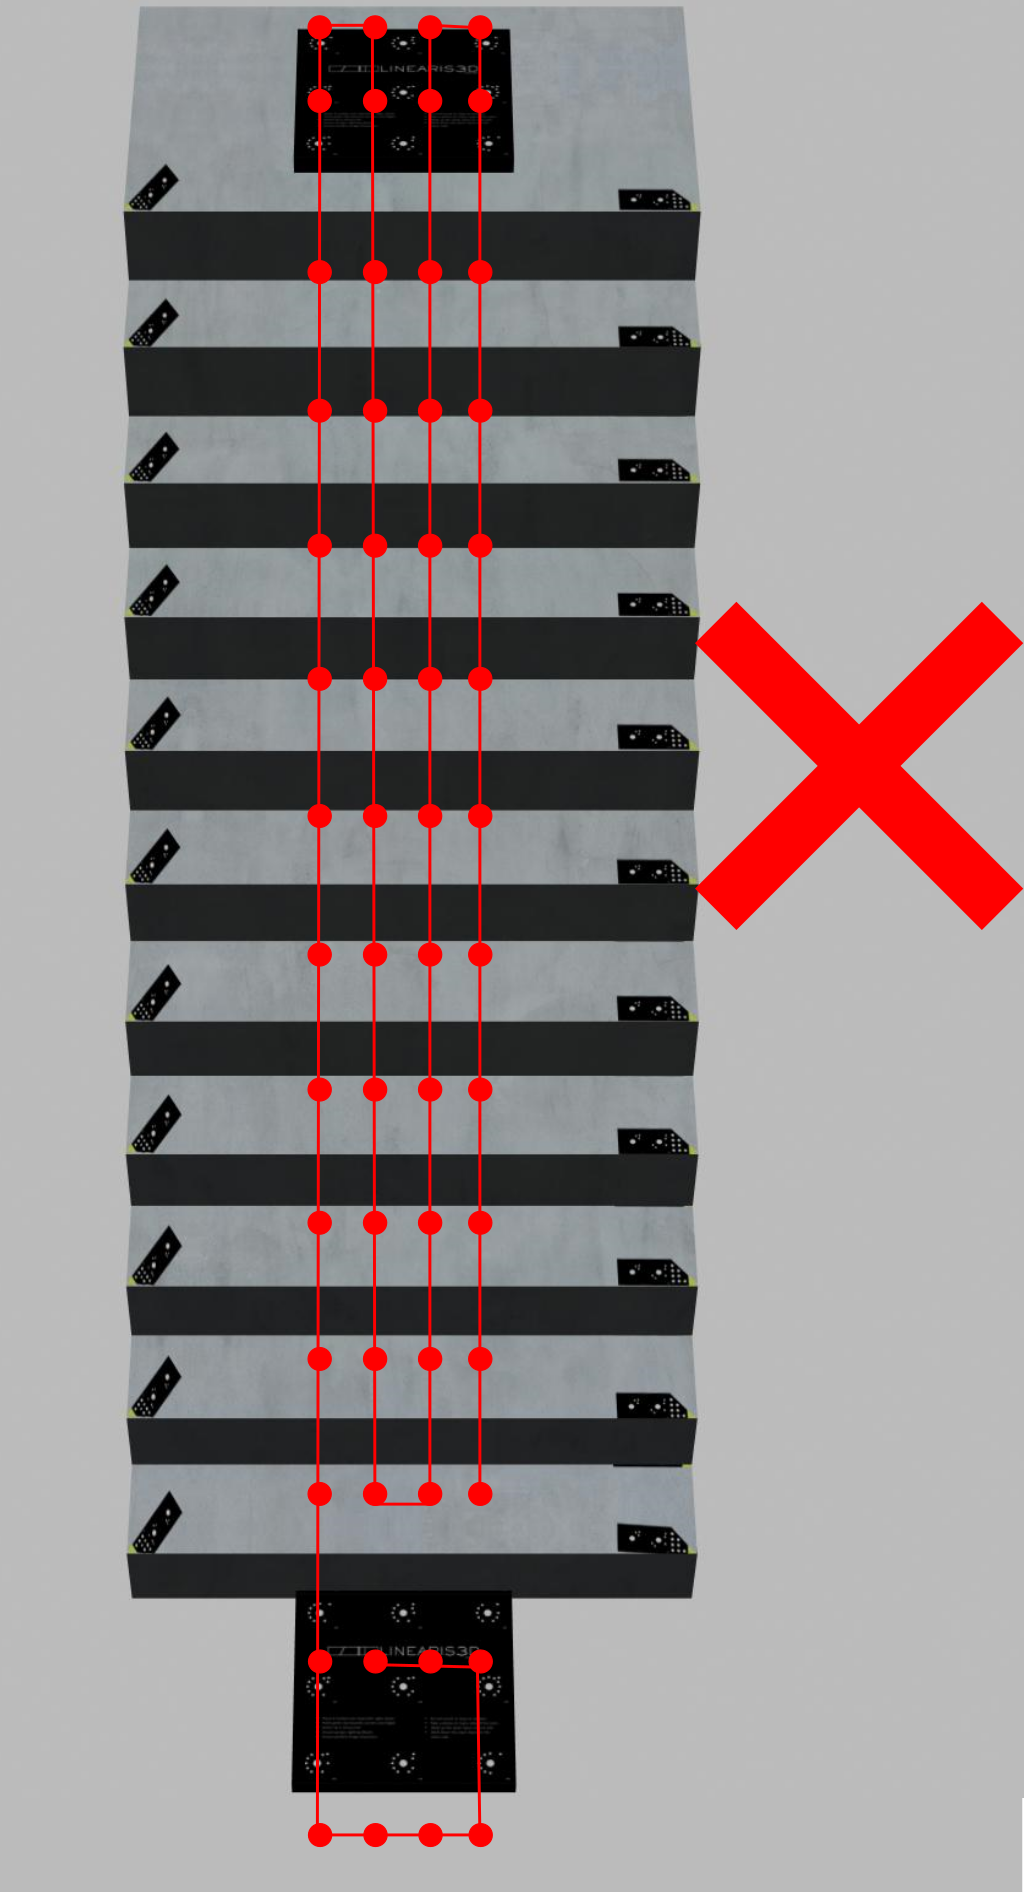
Wrong: Pictures are all taken in the middle of the stairs. Too few images. No potrait photos. Unsystematic photographing. |